Share
Pin
Tweet
Send
Share
Send
In this master class, the process of creating a cover for the phone will be presented. The cover will be made in the form of a fox. Due to the bright color of this animal, to create a thing you will need:
- fabric with a dense texture of orange, brick-red or red (30x40 cm);
- fabric white flannel or chintz (20x15 cm);
- 3 black buttons;
- threads are black, white and orange / red;
- needle for sewing.
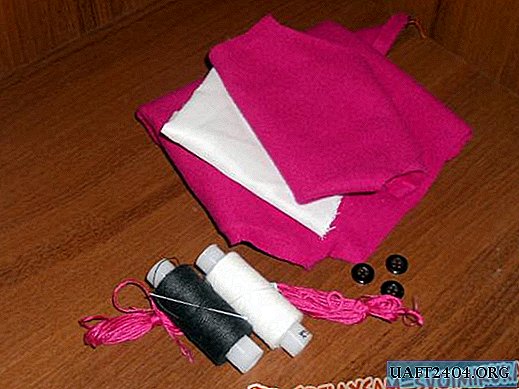
First you need to take measurements of your phone. The phone model used to cover the example of the cover given in the master class has parameters 10x4.5x1 cm ... Next, we draw a contour for the base of the cover on the sheet of paper or on the newspaper - the future "body" of the fox. In addition, we draw the contours of the ears.

Then, the drawn contours must be cut out, applied to the fabric and circled with a pencil for fabric or a sharp piece of soap. Outlined patterns are also cut out. You should end up with one copy of the fox’s “body”, one piece for the breast, two pieces of parts for the ears of red fabric and two pieces of white fabric.

First you need to make fox ears. To do this, you need to take one ear pattern from white fabric and one from red fabric. They need to be sewn from both sides with a blind seam, retreating from the edge about five millimeters. Then carefully twist the stitched to the front side and straighten the seams.

Next, the ears are sewn to the future cover in connectors specially cut for them.

After that, you need to lay the foundation of the future cover from the wrong side. Having retreated about a centimeter from the edge, stitch along the edges with a sewn-in seam. The stitched cover must be turned out on the front side and gently straighten the fabric in the joints. The next step: sewing white fabric in the form of a bib on the cover.

Now we begin to outline the details of the cover, its decorations. First you need to draw a line with a pencil for fabric or a sharp piece of soap on the lines of the fox's face nose features and mark the places where the eyes will be sewn buttons. Then along these lines you need to flash in black thread in two additions. Sew buttons on the eye.

At the tip of the muzzle (at the place where the nose) of the fox, you need to make a longitudinal section equal in length to the diameter of the buttons for the nose. Along the edge, you need to carefully overcast it with red threads.

Now the finishing touch: we attach the fox's muzzle to the body and designate the place where the fox nose button will be sewn. Sew a button not on the tip of the muzzle, but on the breast! That's it, the fox case is ready.

Share
Pin
Tweet
Send
Share
Send


